Denys is the Motion Design School’s script wizard and the author of the Expression Trip course. In this article, he will share how to use the most essential expressions that are an indispensable part of any motion designer’s everyday life.
Welcome to Expression world!
Popular expressions
After Effects offers really wide opportunities, but even they are not enough to solve many simple tasks, and it turns the workflow into hours of routine.
The build-in expression language in After Effects automates a part of your workflow. In this article, I am going to describe examples of the expressions that make my workflow easier and how I approach them to maximize their potential.

Check our Expression Trip course.
Before we start
It is easy to add an expression to a property — just click on it holding Alt key (or Option on Mac):

1. Wiggle
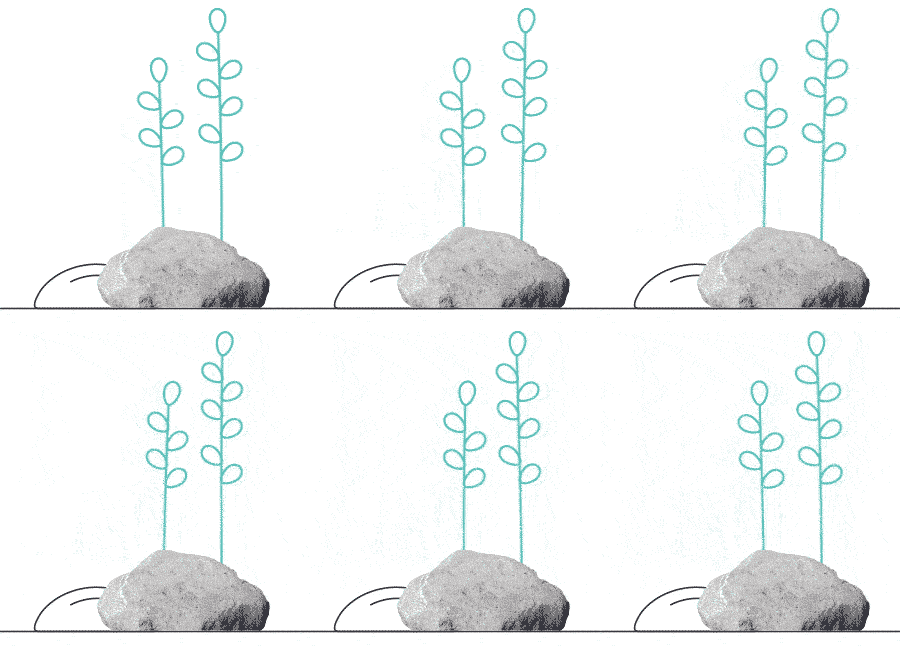
It is one of the most popular expressions. After you add it to a layer’s Position property, the layer starts randomly moving from side to side. If you add it to Scale, the layer starts scaling up and down.
Here is the simple version of wiggle expression:
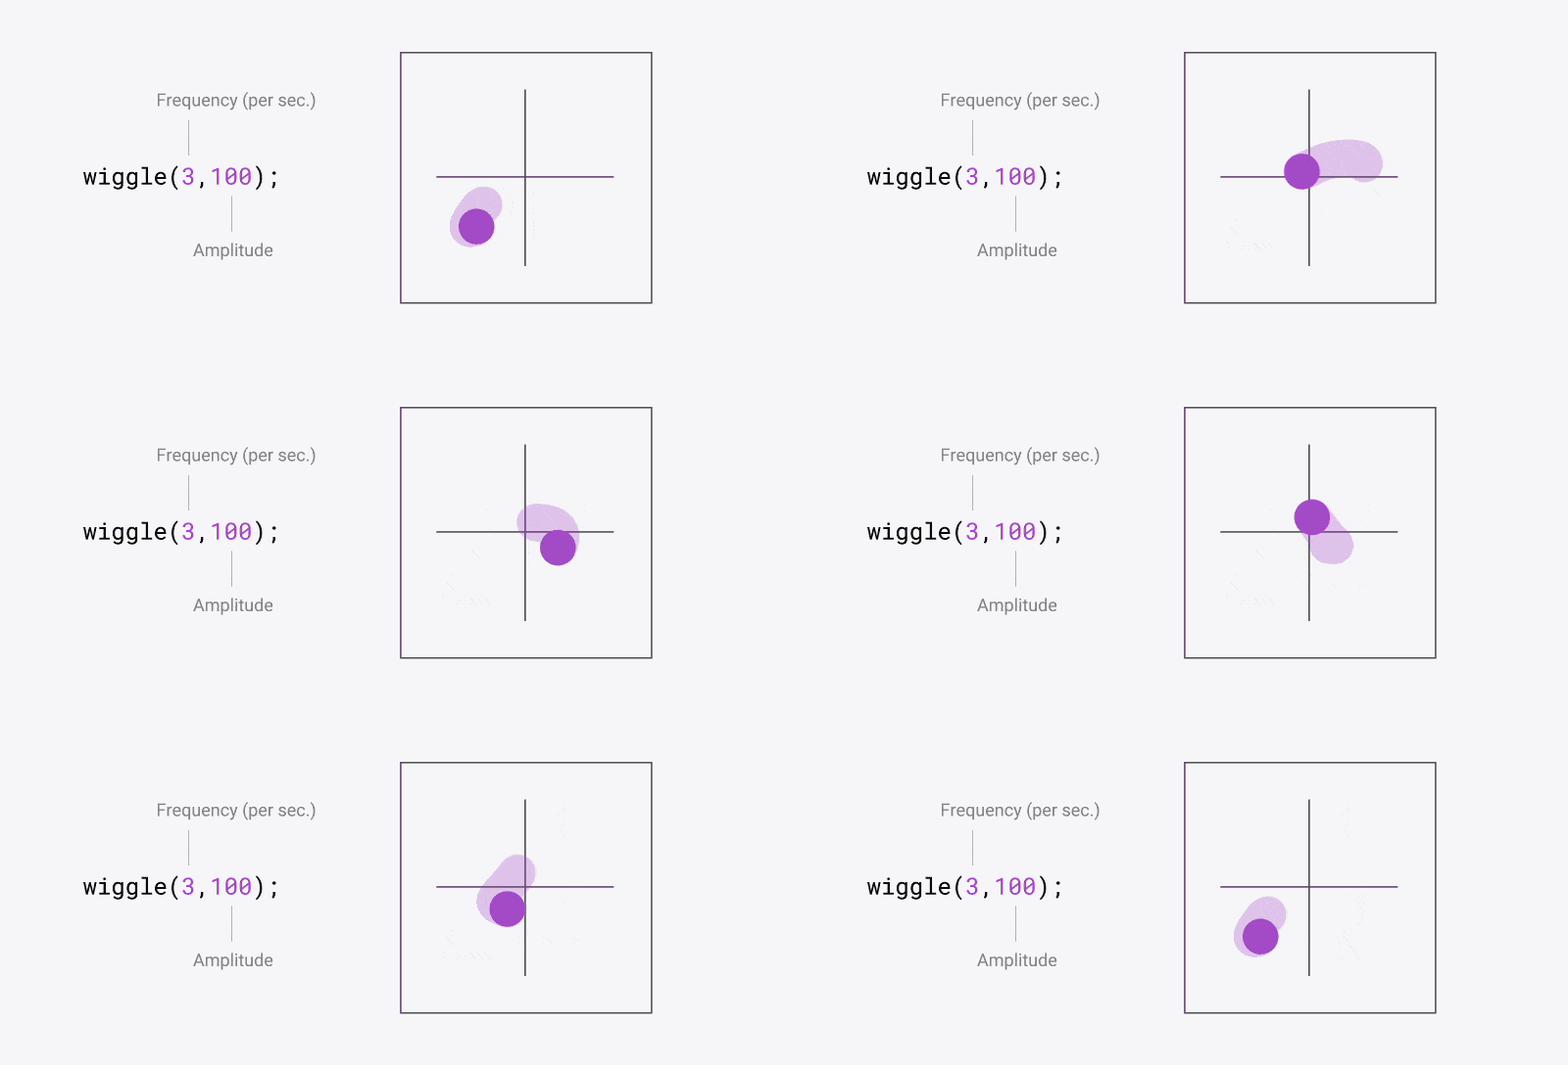
freq = 1;
amp = 100;
wiggle(freq, amp);
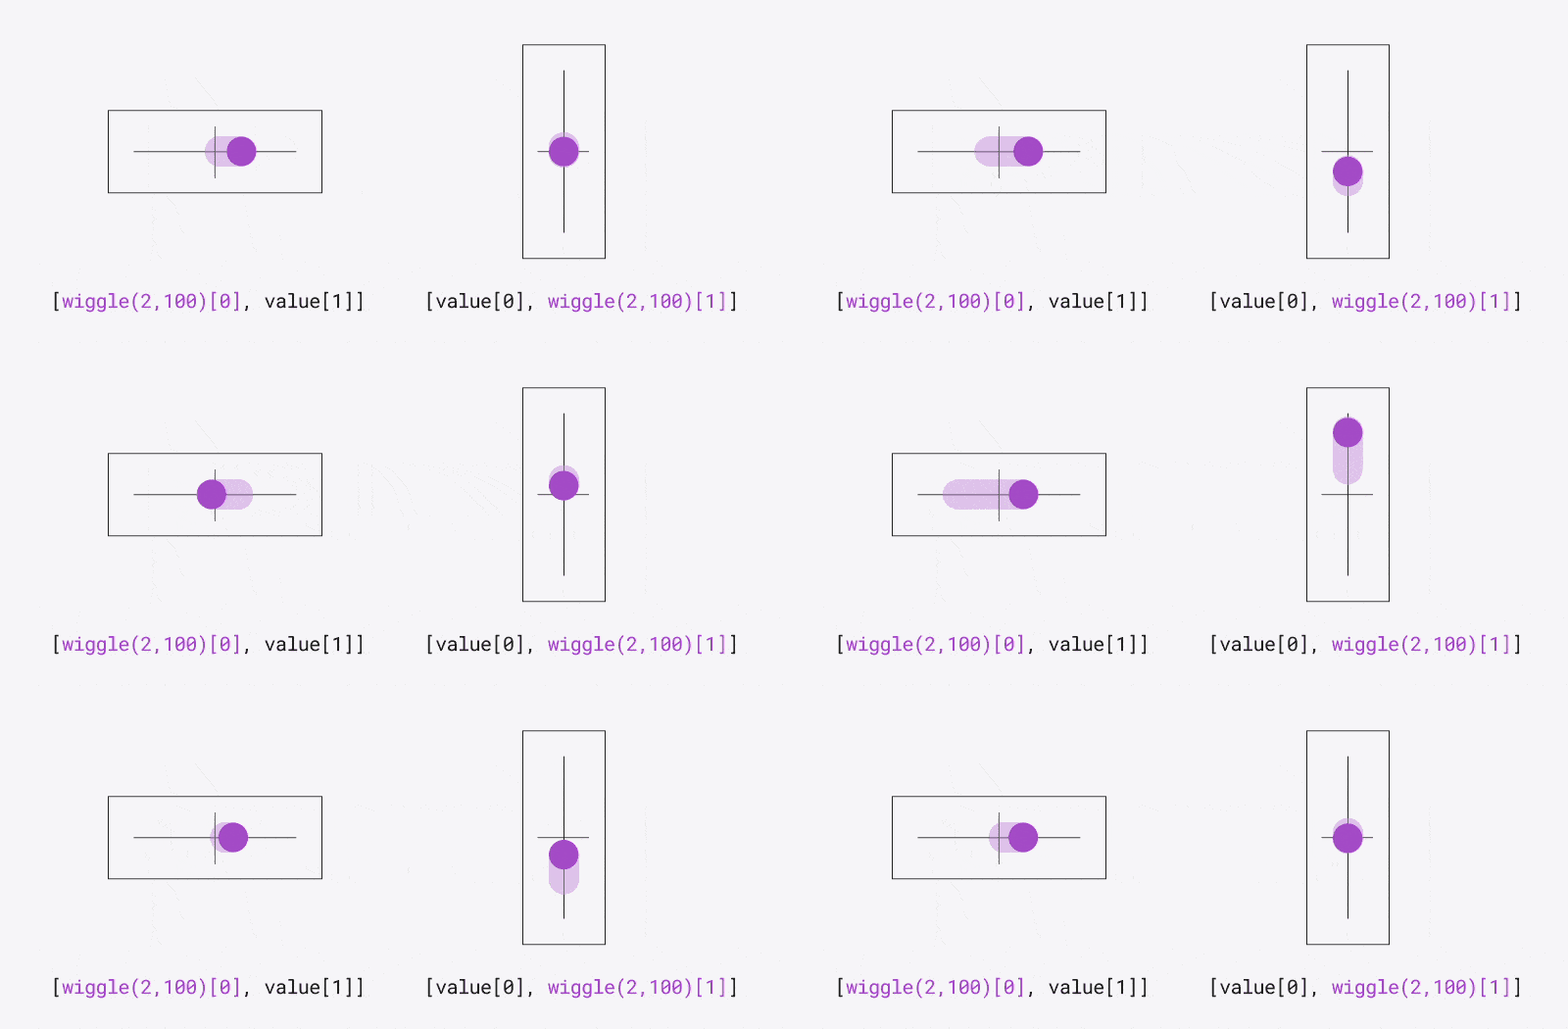
One-Dimension Wiggle: The previous expression allows you to adjust movement along all the axes at the same time. If you need to set up movement along one specific axis, choose just one of the two lines at the end of the expression and delete the other one:
freq = 1;
amp = 100;
wiggle(freq, amp);freq = 1;
 amp = 100;
 w = wiggle(freq, amp);
 [w[0], value[1]] // X-axis animation. For Y-axis animation use this one: [value[0], w[1]] freq = 1;
amp = 100;
wiggle(freq, amp);
How to Loop Wiggle?
To loop your wiggle animation for a specific time in seconds, use the modified expression:
loopTime = 3; // set the length of the loop (in seconds)
 freq = 1;
 amp = 110;
 t = time % loopTime;
 wiggle1 = wiggle(freq, amp, 1, 0.5, t);
 wiggle2 = wiggle(freq, amp, 1, 0.5, t - loopTime);
 linear(t, 0,  loopTime, wiggle1, wiggle2)
 // Expression by Dan Ebbert from motionscript.com
2. Loop in and Loop out
There are two functions, loopIn and loopOut, that can help you to loop your animations and reduce the number of repeated keyframes. They are used for looping your animations before (loopIn) and after (loopOut) keyframes.
Also, they are divided into different types:
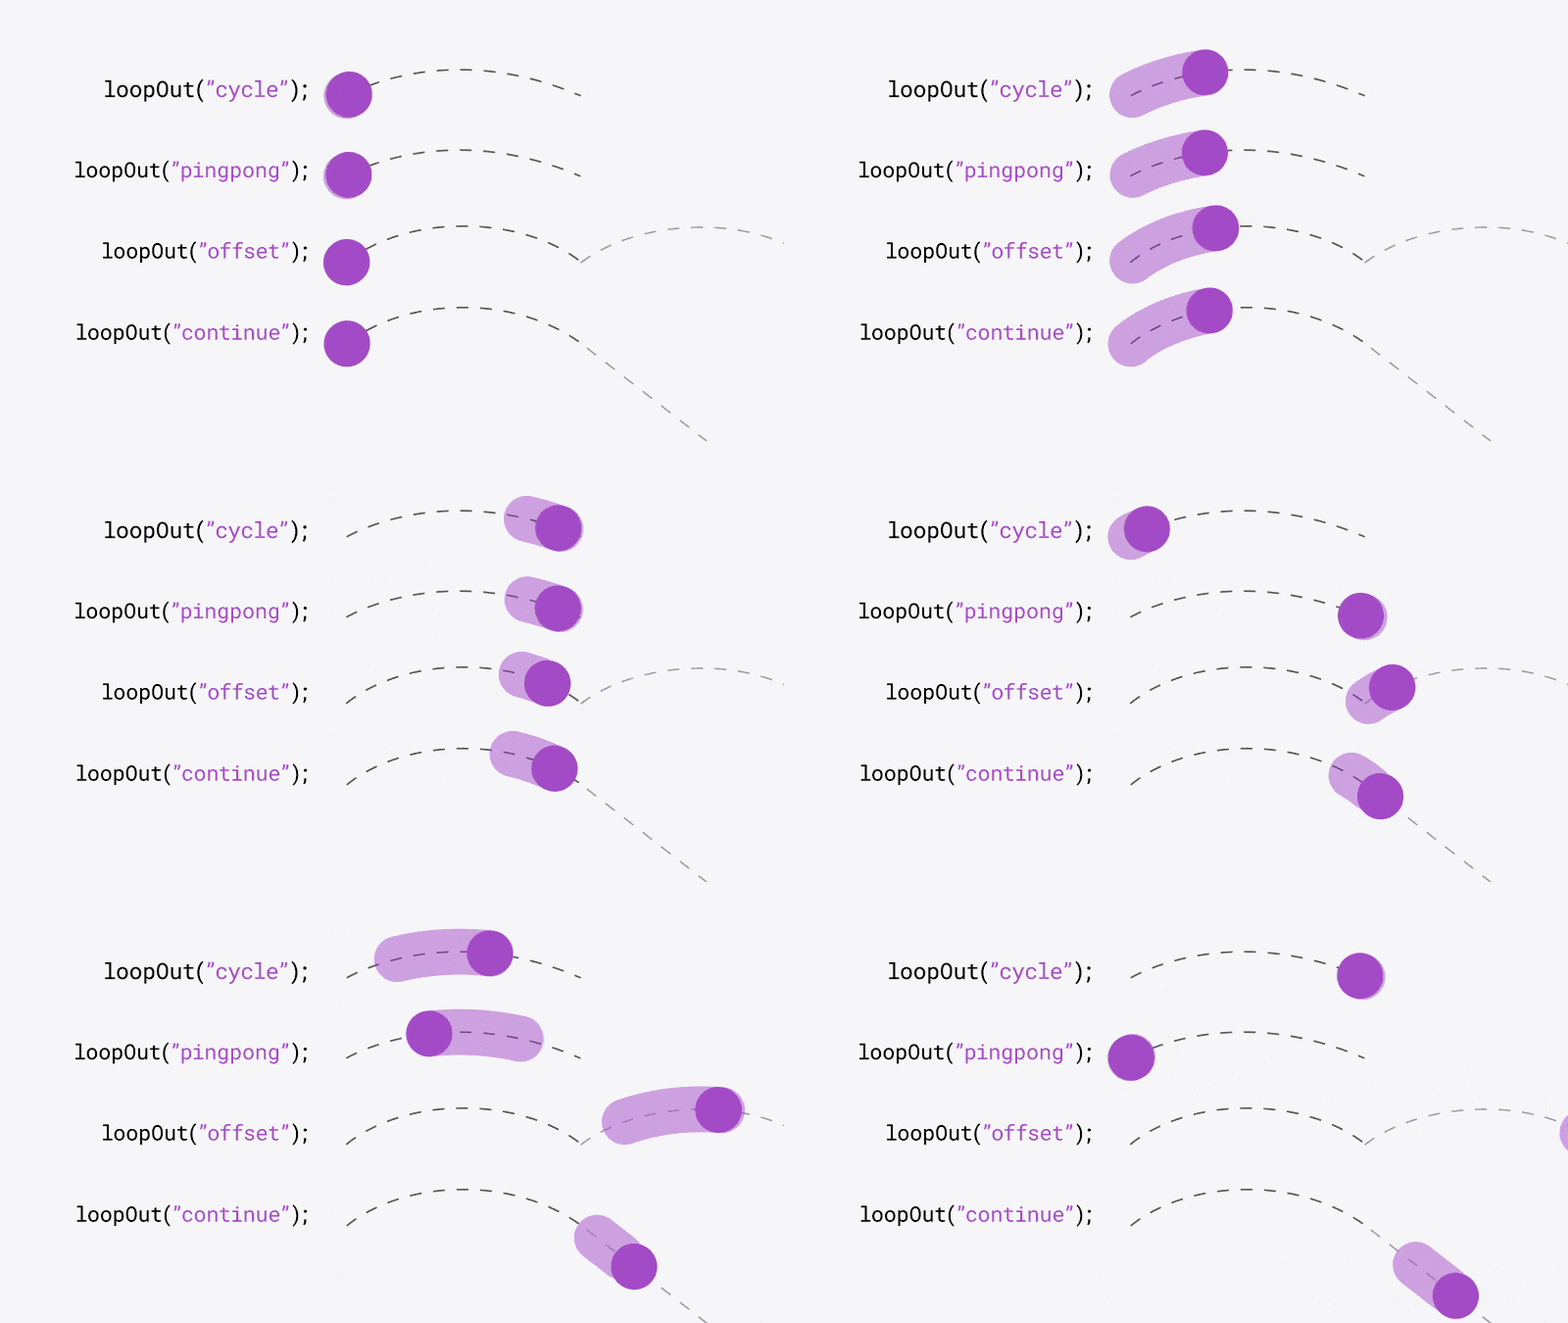

loopOut(); // or loopIn();How to loop animation in both directions?
The problem with these expressions is that it isn’t always obvious which one, loopIn or loopOut, is better to use. Because of that, you can accidentally get a few frames without animation, which you will surely notice at the very last moment. There’s a technique for solving this problem:
loopIn() + loopOut() - value; // Loop animation in both directionsWith it, you can forget where your keyframes are, as your animation will be looped both before and after them.
3. How to loop Path property
The loopIn and loopOut expressions don’t work for animating the Path property. To animate it, use the following expression instead. In the first line, set ‘pinpong’ to ‘true’ instead of ‘false’ to achieve the cycle type of animation in place of the pingpong type:
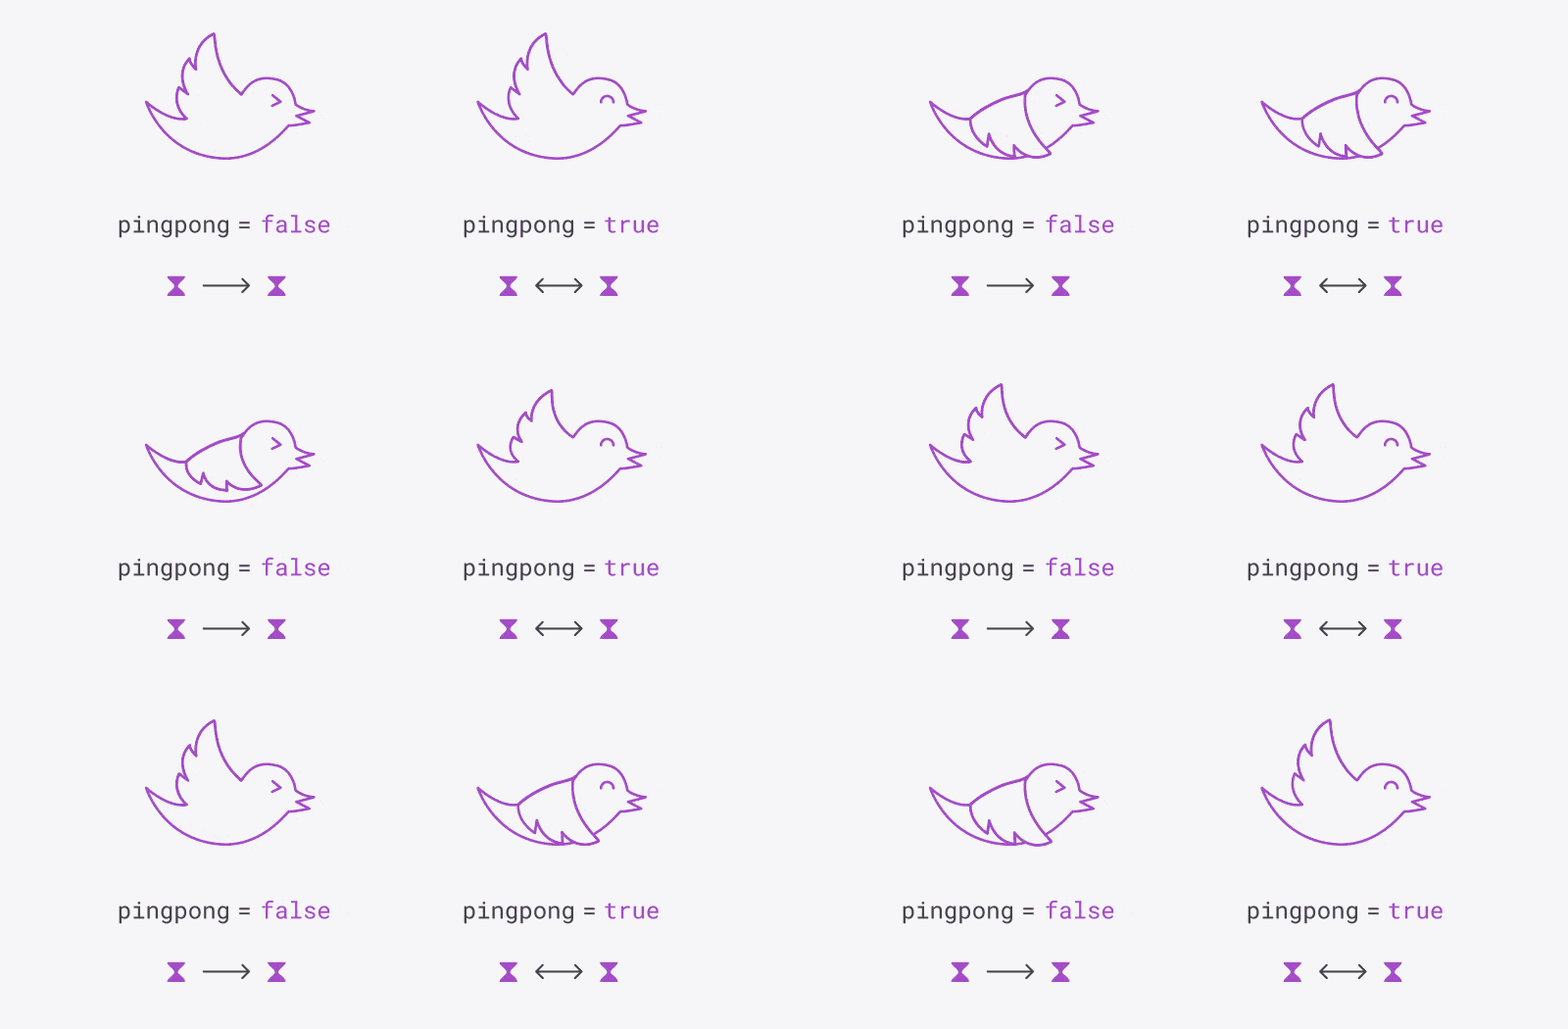
pingpong = true; // to disable change to false
 if (numKeys > 1){
      k1 = key(1).time;
      kn = key(numKeys).time;
      dur = kn - k1;
      t0 = time - k1;
      t = t0%dur;
      n = Math.ceil(t0/dur);
      if (pingpong == true && n%2 == 0){
            valueAtTime(kn - t);
      } else {
         valueAtTime(t + k1);
     }
 } else {
      value;
 }
Well, that’s all for now

Stay tuned for the second part that will cover more advanced techniques of working with expressions.

Want to know more about animation?
Top 5 time-saving Extensions for After Effects
If you animate your works in After Effects and still don’t use the extensions I’m both happy and sad for you. Read this short article till the end and your life will never be the same again. 1. Overlord Preparing source files for animation is one of the most time-consuming phases of the animator’s work. […]
Blending Modes in After Effects
In this Very quick but very useful, we will know how to use blending mode. Just use difference mode and here you are ? Blending Modes in After Effects In Adobe After Effects, blending modes are used to control how different layers or elements interact and blend with each other. They determine how the colors, […]
4 Advanced After Effects Expressions Made Easy
Denys is the Motion Design School’s script wizard and the author of the Expression Trip course. In this article, he will share how expressions can be used to create more complex animation. Popular expressions As you’ve learned from the previous article on top 3 After Effects Expressions to simplify your workflow, programming in After Effects, besides being […]


